Category: Electric Bike

Explore comprehensive electric bike reviews, hardware specifications, and expert buyer’s guides. Find the best adult e-bikes, folding models, and performance rides.

  • MotoTec Dirt Bike Troubleshooting & 48V/60V Lithium Battery Upgrade Guide

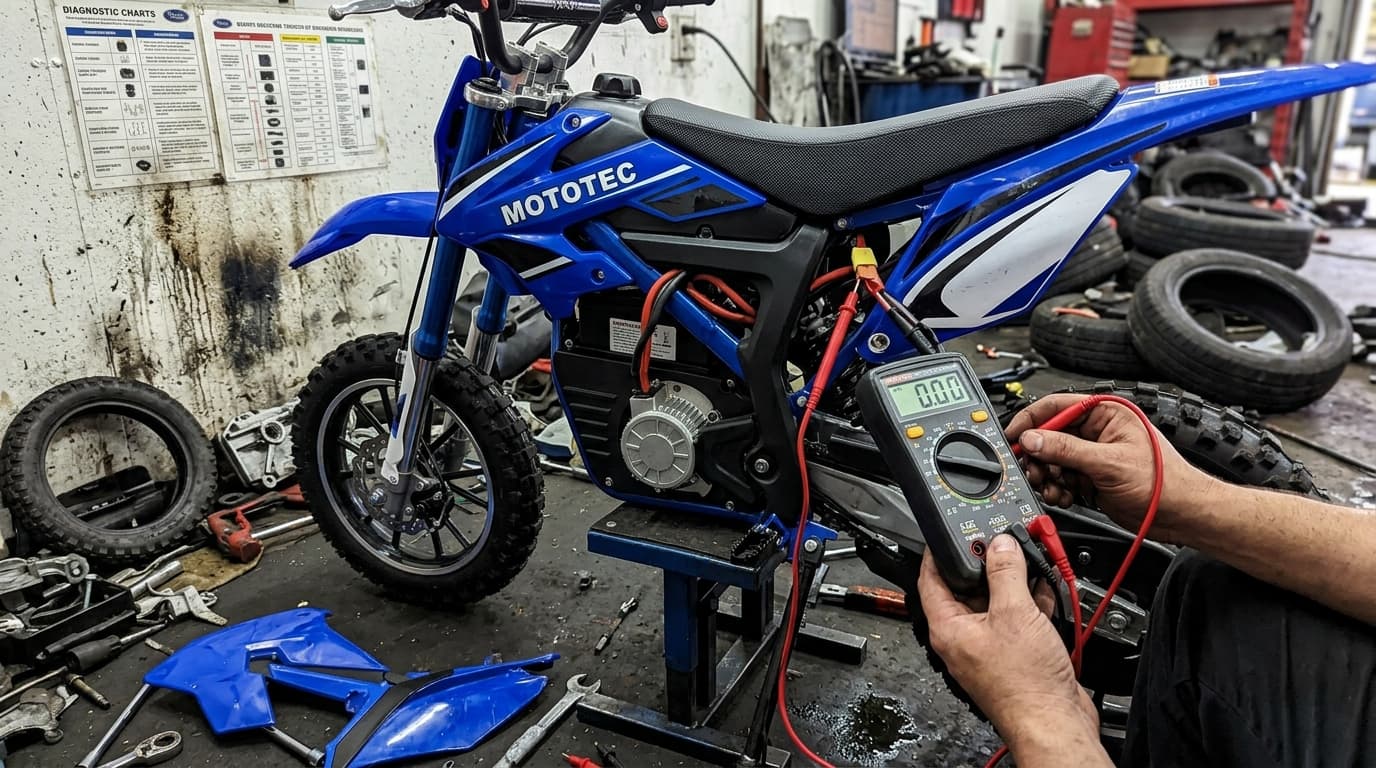
    MotoTec Dirt Bike Troubleshooting & 48V/60V Lithium Battery Upgrade Guide

    Unlike toy-grade mini bikes, the MotoTec Electric Dirt Bike lineup (such as the MotoTec 24V Demon, 36V Pro, and 48V 1000W/1600W Pro models) features heavy-duty steel frames, hydraulic suspension, and high-torque brushless motors. However, stock lead-acid batteries and factory controller cut-offs often cause premature power failures. This guide walks you through complete troubleshooting, wiring pinouts, and 48V/60V lithium conversion options.


    1. MotoTec Model Comparison & Factory Specs

    Identify your specific MotoTec model series before attempting to bridge wires or upgrade your speed controller:

    While MotoTec bikes feature robust factory BLDC setups, many modders cross-shop or swap parts with Razor models. If you are comparing build platforms, read our Razor MX125 & MX650 Battery Upgrade & Wiring Guide to evaluate motor and battery bay differences.

    Model Series Motor Type Stock Battery Max Lithium Upgrade
    MotoTec 24V Demon 250W Brushed 24V 7Ah SLA 36V Plug & Play Swap
    MotoTec 36V Pro / GT 500W-1000W Neodymium Brushless 36V 12Ah SLA 48V 20Ah Lithium (30+ mph)
    MotoTec 48V Pro 1600W 1600W Brushless BLDC 48V 12Ah SLA Pack 60V/72V Brushless Swap (40+ mph)

    2. Troubleshooting: MotoTec Won’t Accelerate or Turn On

    Follow these step-by-step diagnostic procedures when your MotoTec dirt bike turns on (power display lights up) but pressing the throttle gives zero response:

    1. Inspect Brake Lever Micro-Switches: MotoTec bikes feature dual safety brake cutoffs. Disconnect the 2-pin brake cutoff wires coming from the handlebars. If the throttle starts working, replace the sticky brake lever switch.
    2. Check the 3-Speed Limiter Key: Most MotoTec models come with a parent key lock under the frame (Low/Med/High speed switch). Ensure the switch pins are fully seated and free of corrosion.
    3. Brushless Motor Hall Sensor Test: Use a multimeter set to DC Voltage on the 5-pin hall sensor plug (Red +5V, Black GND, Yellow/Blue/Green signals). Slowly rotate the rear wheel by hand to check if signal voltage pulses between 0V and 5V.

    If you suspect a faulty throttle or damaged hall sensor signal, check our step-by-step E-Bike & Scooter Throttle Diagnostics Guide to pin test signal voltage outputs.

    ⚡ Tech Notice: Never attempt to power on a 48V MotoTec controller using a car battery jump starter. Over-current spikes will instantly blow the internal MOSFETs inside the controller.

    3. MotoTec Brushless Controller Wiring Diagram

    Below is the standard color pinout diagram for MotoTec 36V/48V Brushless DC Motor Controllers:

    [POWER INPUT] —> Thick RED (+48V Battery) / Thick BLACK (- Ground)
    [MOTOR PHASE] —> Thick YELLOW (Phase A) / Thick BLUE (Phase B) / Thick GREEN (Phase C)
    [HALL SENSORS] —> 5-Pin Connector: Red (+5V) / Black (GND) / Yellow, Blue, Green (Signals)
    [THROTTLE] —> 3-Pin Plug: Red (+5V) / Black (GND) / Green (Signal Output)
    [3-SPEED LIMITER] —> 3-Pin Switch: Black (GND) / Blue (Low Speed) / Brown (High Speed)

    If you are replacing the factory controller box with an aftermarket programmable unit, follow our complete guide on Sabvoton & Kelly Controller Universal Wiring & Pinouts. For key ignition modifications, see our 3-Speed Throttle & Key Ignition Wiring Guide.

    4. Upgrading to 48V/60V Lithium & High-Amp BMS

    Ditching the factory 30-pound lead-acid battery tray for a high-discharge 48V or 60V Lithium-ion battery dramatically reduces bike weight while maintaining top speeds throughout your ride.

    Recommended Conversion Steps:

    • Measure the Battery Bay: MotoTec frames have a center-mounted battery box. Select a triangle or rectangular battery pack that fits within 10.5″ x 6.5″ x 5.5″.
    • XT60 / XT90 Connector Conversion: Replace factory ring terminals with heavy-duty anti-spark XT90-S connectors to prevent sparks when plugging in high-voltage lithium packs.
    • Upgraded Charger Port: Swap the stock 3-pin XLR charge port for a high-amp 3-prong aviation plug rated for lithium chargers.

    Planning to ride your upgraded MotoTec on public roads? Learn how to install pedal drive kits and PAS sensors with our Street-Legal Electric Dirt Bike Conversion Guide. If you are building on a strict budget, refer to our Electric Dirt Bike Under $200 DIY Guide.

    5. Frequently Asked Questions & Fault Codes

    Q: Why does my MotoTec motor cut out under heavy acceleration?

    A: This is a classic symptom of Low Voltage Cutoff (LVC) triggered by the battery BMS. Stock lead-acid batteries sag heavily under high torque demands. Upgrading to a lithium pack with a 50A+ continuous BMS resolves this issue.

    Q: Can I use a Razor throttle on a MotoTec electric dirt bike?

    A: Both use standard 0.8V – 4.2V Hall effect throttles, but the wire pinouts inside the plastic plug are different. You must depin the connector and align the +5V power, Ground, and Signal wires correctly.


    Disclaimer: Always ensure your electric dirt bike is turned off and the main fuse is removed before working on motor phase wires or controller pinouts.

  • Razor Dirt Quad Troubleshooting & Wiring Guide: Controller Replacement, Battery Swaps & Speed Mods

    Razor Dirt Quad Troubleshooting & Wiring Guide: Controller Replacement, Battery Swaps & Speed Mods

    The Razor Dirt Quad is one of the most popular 4-wheel electric ATVs for kids and young modders. However, after seasons of hard riding, issues like “power light on but won’t move” or melted controller wires are extremely common. This guide gives you the exact diagnostic steps, wiring pinouts, and voltage upgrade procedures to get your Quad back on the trails.


    1. Razor Dirt Quad Model Versions & Battery Specs

    Understanding which version of the Razor Dirt Quad / Dirt Quad 500 you own is essential before buying replacement parts or performing battery upgrades.

    While 4-wheel ATVs offer extra stability, their electrical architecture shares many components with Razor’s dirt bike lineup. If you also work on two-wheel models, refer to our comprehensive Razor MX125 & MX650 Battery Upgrade & Wiring Guide for comparison.

    Model Name Factory Voltage Stock Controller Model Max Safe Upgrade
    Standard Dirt Quad 24V (2x 12V SLA) ZK2400-DP-7 Pin / HB2430-TYC 36V Overvolt (14+ mph)
    Dirt Quad 500 36V (3x 12V SLA) CT-364C / 500W Brushless 48V Lithium Swap (20+ mph)

    2. Diagnostic Flowchart: What to Do When It Won’t Move

    Follow this quick 3-step diagnostic sequence before ordering new parts unnecessarily:

    1. Test Battery Terminal Voltage: Put a multimeter on the charging port. A healthy 24V system should read between 25.2V and 27.6V when fully charged. If it reads under 20V, the batteries are dead or sulfated.
    2. Check the Brake Cutoff Switch: Razor Quads feature a safety brake switch. If the switch wire is stuck closed, the controller disables motor power automatically.
    3. Inspect Fuse & Reset Button: Locate the 30A inline fuse or thermal circuit breaker near the battery tray. Push to reset if popped.

    For more detailed step-by-step diagnostic procedures when the throttle is completely unresponsive, see our dedicated Razor Throttle Troubleshooting & Blink Codes Guide.

    ⚡ Pro Tech Tip: If the throttle light turns green but clicking the throttle produces a “clicking noise from the controller without wheel rotation”, your controller relay is good, but your motor brushes or battery cells are dead under load!

    3. Stock Controller Wiring Diagram & Pinout Table

    Use this wire color reference map when replacing the speed controller box on standard 24V/36V Razor Quads:

    [BATTERY] —> Thick RED (+24V/36V) / Thick BLACK (GND Ground)
    [MOTOR] —> Thick BLUE (Motor Pin A) / Thick YELLOW (Motor Pin B)
    [THROTTLE] —> 4-Pin or 6-Pin Plug: RED (+5V) / BLACK (GND) / GREEN (Signal) / ORANGE (Key Switch)
    [CHARGER] —> Thin RED (+ Charge) / Thin BLACK (- Charge)
    [BRAKE LEVER]—> Thin YELLOW / Thin BLACK (Brake Disconnect)

    When upgrading to an aftermarket twist grip with integrated key ignition and LED voltage display, check out our tutorial on 3-Speed Throttle & Key Ignition Wiring to convert your quad’s stock handle controls.

    4. 24V to 36V Overvolt Upgrade Guide

    Upgrading a standard 24V Dirt Quad to 36V delivers an instant 50% speed increase and massive hill-climbing torque without burning out the stock 350W motor immediately.

    Required Conversion Parts:

    • Additional 12V 12Ah SLA Battery (or a single 36V 15Ah Lithium LiFePO4 Pack).
    • 36V 500W Brushed Speed Controller (Matches stock throttle connectors).
    • 36V Smart Battery Charger with 3-pin XLR port.

    Looking for affordable project bikes or cheap lithium battery options for this build? Read our budget guide on How to Build an Electric Dirt Bike Under $200.

    5. Frequently Asked Questions & Troubleshooting

    Q: Why does my Razor Dirt Quad charger stay GREEN and won’t charge?

    A: A green light indicates the charger senses no current draw. This happens if the battery voltage has dropped too low for the charger to detect, or if the inline fuse between the charge port and battery box is blown.

    Q: Can I put pneumatic aggressive knobby tires on a stock Dirt Quad?

    A: Yes! Stock wheels are 12-1/2 x 2.75 inches. You can install up to 13-inch mini ATV tires, but keep in mind larger tire diameters reduce acceleration torque unless you re-sprocket the rear chain drive.


    Disclaimer: Working with lead-acid and lithium batteries carries short-circuit risks. Always double-check polarity with a digital multimeter before powering on new controllers.

  • Razor MX125 & MX650 Battery Upgrade Guide: 72V Mods, Wiring Diagram & Street Legal Pedal Kit

    Razor MX125 & MX650 Battery Upgrade Guide: 72V Mods, Wiring Diagram & Street Legal Pedal Kit

    Looking to unleash the hidden power of your Razor MX125 or MX650 electric dirt bike? Whether you are upgrading from stock lead-acid batteries to a high-performance 72V lithium setup or trying to make your e-dirt bike street-legal with a pedal assist kit, this complete guide covers full voltage specs, wiring pinouts, and custom conversion steps.


    1. Razor MX125 vs MX650: Specs & Upgrade Potential

    The Razor MX125 is the ultimate entry-level mini dirt bike, while the Razor MX650 Dirt Rocket is a fan favorite for adult and youth modders. However, both come factory-limited with heavy lead-acid batteries and restricted speed.

    Before planning your build, keep in mind that frame dimensions and internal harness connections vary across models. If you are comparing mid-size frames, check out our detailed Razor MX650 vs. MX500 Wiring Diagram Breakdown to understand specific stock controller pinout differences.

    Model Stock Voltage Stock Speed Max Mod Capacity
    Razor MX125 12V (Lead-Acid) 8 mph 36V Brushless Swaps (15-20 mph)
    Razor MX650 36V (Lead-Acid) 17 mph 72V Lithium & 3000W Motor (45+ mph)

    2. How to Upgrade from Lead-Acid to 48V/72V Lithium

    Replacing the heavy factory SLA (Sealed Lead Acid) batteries with a Lithium LiFePO4 or Li-ion battery pack is the single most effective performance upgrade you can perform.

    Required Parts for a 72V MX650 Conversion:

    • 72V Lithium Battery (30A-50A BMS) – Sheds over 15 lbs while eliminating severe voltage sag.
    • 72V Brushless Controller (e.g., Sabvoton, FarDriver, or Kelly) – Replaces the stock 36V brushed module. Refer to our guide on Sabvoton & Kelly Controller Universal Wiring Breakdown for motor phase and Hall sensor mapping.
    • 1800W – 3000W Brushless DC Motor – Ensures high torque without thermal throttling.
    • Twist Throttle with Key Switch & Voltmeter – Follow our step-by-step Stock Razor Throttle to 3-Speed Key Ignition Upgrade Guide to match wire pins correctly.

    ⚠️ Safety Warning: Always disconnect the main circuit breaker or fuse before touching power lines. Never short the red (positive) and black (negative) battery leads.

    3. Razor Stock Controller Wiring Diagram & Pinout

    Below is the color-coded wire identification table for standard Razor dirt bike speed controllers (CT-364C / ZK3630):

    [BATTERY PORT] —> Thick RED (+72V/36V) / Thick BLACK (GND)
    [MOTOR PORT] —> Thick BLUE (Motor +) / Thick YELLOW (Motor -)
    [THROTTLE PORT] —> Thin RED (+5V) / Thin BLACK (GND) / Thin GREEN (Signal)
    [POWER SWITCH] —> Thin RED / Thin BLUE
    [BRAKE LEVER] —> Thin YELLOW / Thin BLACK (Brake Cutoff Switch)

    If your bike fails to engage power after completing the wiring, follow our Razor Electric Bike Throttle Diagnostics & Troubleshooting Guide to test Hall signal voltages with a multimeter.

    4. Adding Pedals: How to Make Your E-Dirt Bike Street Legal

    Many local traffic regulations require electric bikes to feature operable pedals to qualify as Class 2 or Class 3 e-bikes. Since off-road dirt bikes lack cranks, installing a pedal assist system (PAS) is essential for neighborhood commuting.

    For a deep dive into local compliance laws, pedal chain drive clearance, and magnet ring sensor installation, check out our full tutorial on How to Make an Electric Dirt Bike Street Legal with a Pedal Kit & PAS.

    Step-by-Step Pedal Installation Checklist:

    1. Install Bottom Bracket Extension: Mount an aftermarket bolt-on bottom bracket plate onto the lower frame rails.
    2. Chain Sprocket Alignment: Run a secondary drive chain from the rear wheel sprocket to the right crank arm.
    3. PAS (Pedal Assist Sensor) Setup: Magnet ring attached to the pedal spindle wired directly into your upgraded controller’s PAS port.

    Note: If you are building on a tight budget or restoring a cheap donor frame under $200, check out our Best Electric Dirt Bike Under $200 DIY Restoration Guide or explore 4-wheeled builds with our Razor Dirt Quad Troubleshooting & Wiring Manual.

    5. Frequently Asked Questions & Troubleshooting

    Q: Why is my Razor MX650 motor humming but not turning after a battery swap?

    A: This usually indicates a voltage mismatch or loose hall sensor connection. Ensure your controller is rated for 72V and check if the brake lever cut-off switch is engaged.

    Q: Can I use the stock charger for a Lithium Battery upgrade?

    A: NO! Never use a lead-acid charger on a lithium battery. Doing so can cause thermal runaway or permanently damage the BMS. Always use a dedicated 72V Lithium smart charger.


    Disclaimer: Modifying electric bikes involves high-voltage electrical systems. Always follow local traffic laws regarding street legality and safety gear.