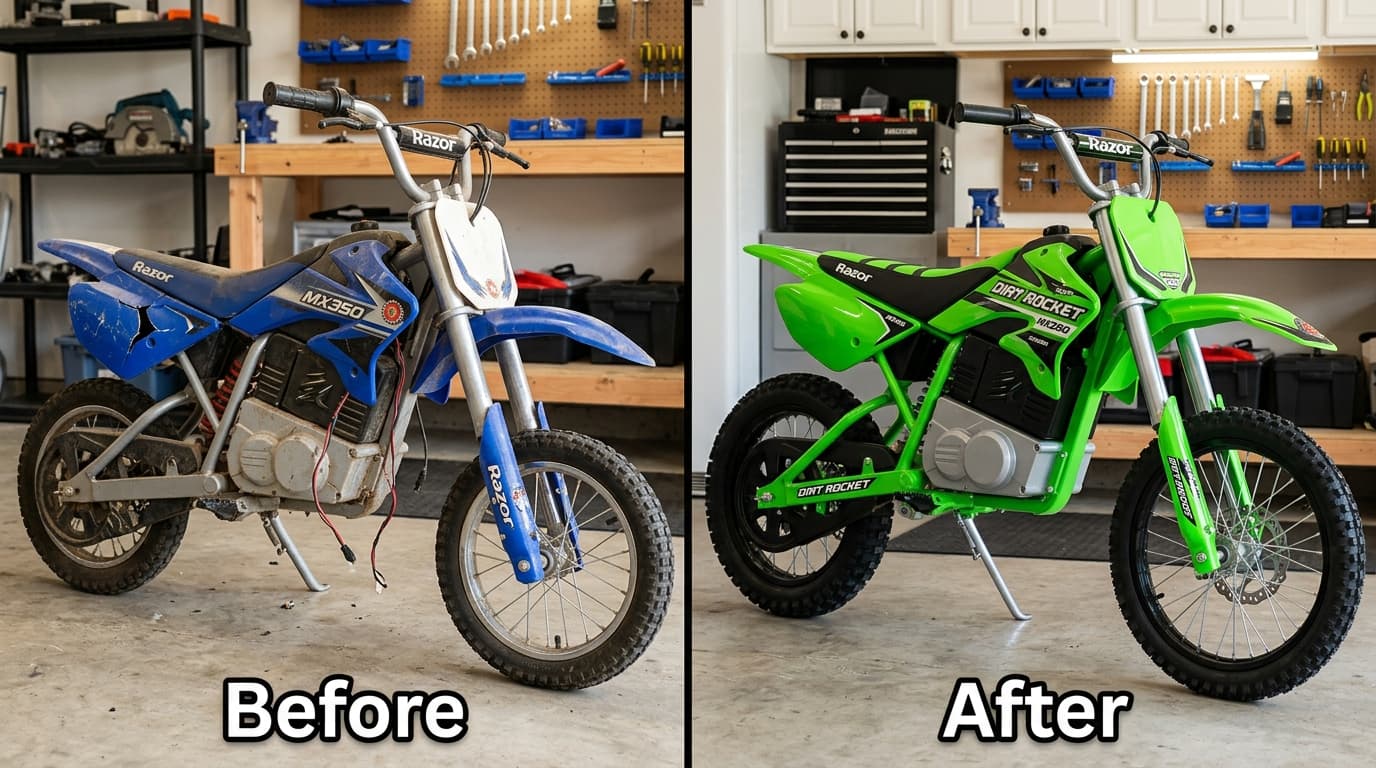
Category: Electric Bike

Explore comprehensive electric bike reviews, hardware specifications, and expert buyer’s guides. Find the best adult e-bikes, folding models, and performance rides.

  • Sur-Ron Light Bee X Primary Belt to 420 Chain Conversion Guide

    Sur-Ron Light Bee X Primary Belt to 420 Chain Conversion Guide


    While the stock primary belt drive on the Sur-Ron Light Bee X provides smooth and quiet power delivery for standard 60V riding, upgrading to high-torque 72V battery and controller configurations often leads to premature belt stripping or snapping. Converting the primary drive from a rubber belt to a heavy-duty 420 chain kit eliminates belt failure under heavy acceleration and off-road rock impacts.

    This guide walks you through calculating gear ratios, installing the jackshaft drive sprocket, and setting optimal chain slack.


    1. Primary Belt vs. 420 Chain Conversion Overview

    Standard rubber primary belts are rated for peak mechanical torque outputs under 8kW. When running aftermarket controllers capable of 12kW to 15kW+, instant motor torque causes the belt teeth to shear. A 420 steel chain conversion delivers several benefits:

    • Zero Snap Risk: Heavy-duty 420 roller chains handle high peak torque spikes from tuned 72V controllers.
    • Custom Gear Ratios: Changing the primary jackshaft tooth count allows fine-tuning for low-end wheelie torque or high-end top speed.
    • Durability in Mud & Grit: Small rocks and debris that would snap a tensioned rubber belt pass through chain drive links without snapping the drive.

    2. Step-by-Step Primary Chain Conversion Process

    Step 1: Remove Main Skid Plate & Belt Cover

    Unbolt the aluminum skid plate underneath the frame and remove the plastic primary belt cover to expose the motor pulley and jackshaft pulley.

    Step 2: Loosen Jackshaft Axle & Remove Belt

    Loosen the jackshaft tensioning bolts. Push the jackshaft forward to relieve belt tension, then slide the OEM rubber belt off both pulleys.

    Step 3: Install 420 Motor & Jackshaft Sprockets

    Remove the factory smooth belt pulleys using a lockring tool. Slide the 420 steel motor sprocket onto the motor shaft keyway and torque the retaining nut to factory specifications (35 Nm). Install the matching jackshaft chain sprocket.

    Step 4: Route 420 Chain & Set Slack

    Loop the 420 chain around both sprockets and secure the master link retaining clip with the closed end facing the direction of chain rotation. Adjust jackshaft tension bolts until you achieve 10mm to 15mm of vertical chain play.

    For power controller tuning tips after upgrading your drivetrain, explore our Sur-Ron Light Bee 72V battery and controller upgrade guide.


    Frequently Asked Questions

    Why convert a Sur-Ron Light Bee X primary belt to a 420 chain?

    Upgrading to a heavy-duty 420 chain kit prevents premature belt stripping and snapping under high-torque 72V battery and aftermarket controller configurations (12kW to 15kW+).

    How much vertical play should a primary 420 chain have?

    You should adjust the jackshaft tension bolts until you achieve 10mm to 15mm of vertical chain play to prevent bearing binding.

  • Sur-Ron Ultra Bee Controller Upgrade & 74V/84V Power Tuning Guide

    Sur-Ron Ultra Bee Controller Upgrade & 74V/84V Power Tuning Guide


    The Sur-Ron Ultra Bee bridges the gap between lightweight e-dirt bikes like the Light Bee X and full-size gas motorcycles. Delivering 12.5kW of factory peak power from its 74V PMSM motor, the Ultra Bee chassis is built for demanding off-road trails. However, unlocking massive 20kW+ output and custom throttle mapping requires upgrading the stock controller to high-current aftermarket units such as the Torp TC1000 or EBMX X9000.

    This technical guide details the wiring protocols, motor sensor pinouts, and power tuning considerations when performing a controller swap on the Sur-Ron Ultra Bee.


    1. Factory Ultra Bee Electrical Architecture Overview

    Unlike the simpler Light Bee harness, the Ultra Bee incorporates an advanced CAN-bus communication network linking the electronic display, MCU (Motor Control Unit), and 74V 55Ah smart battery pack:

    • System Voltage: 74V nominal (84V fully charged).
    • SRTC (Sur-Ron Traction Control): Uses wheel-speed algorithms and motor encoder feedback to mitigate rear wheel slip.
    • Reverse Functionality: Managed directly through the handlebar switch matrix and controller logic.

    2. Aftermarket Controller Selection: Torp TC1000 vs. EBMX X9000

    When selecting a high-power controller for the Ultra Bee, plug-and-play harness integration is vital to retain factory display readouts and handlebar switch functions.

    • Torp TC1000: Specifically engineered for seamless integration with the Ultra Bee OEM wiring harness and stock dashboard display. It allows bypass-free power tuning up to 18kW on stock batteries and up to 25kW+ on custom 84V high-discharge packs.
    • EBMX X9000: Offers heavy-duty thermal heat-sinking and custom phase mapping, making it ideal for continuous high-amp motocross racing applications.

    3. Step-by-Step Controller Installation & Wiring Connections

    Step 1: Main Power Isolation

    Disconnect the main battery plug under the seat enclosure and toggle off the high-voltage circuit breaker before touching any phase wire terminals.

    Step 2: Phase Cable & Encoder Wiring

    Remove the stock controller cover. Unbolt the three heavy-gauge motor phase leads (A, B, C). Unlike traditional Hall sensors, the Ultra Bee uses a high-precision internal motor encoder. Connect the main encoder harness securely to the aftermarket controller’s matching connector.

    Step 3: Handlebar Switch Harness Integration

    Plug in the multi-pin display and switch harness adapter. Verify that key functions—including Sport/Eco modes, SRTC toggles, and reverse gear—communicate correctly through the controller app setup wizard.

    If you are building smaller custom bike setups or troubleshooting general throttle inputs, read our tutorial on Sur-Ron Light Bee 72V battery and controller conversions.


    4. Drivetrain & Primary Belt Maintenance

    Increasing the Ultra Bee’s output beyond 18kW places immense strain on the primary belt drive and jackshaft bearings. Check primary belt tension regularly (aim for 5–8mm deflection under moderate thumb pressure) to prevent belt tooth stripping during hard launches.


    Frequently Asked Questions

    What aftermarket controllers are available for the Sur-Ron Ultra Bee?

    Popular options include the Torp TC1000 for seamless integration with OEM dashboard displays and the EBMX X9000 for heavy-duty thermal management and motocross racing applications.

    What is the recommended primary belt deflection for a tuned Ultra Bee?

    You should aim for 5mm to 8mm of deflection under moderate thumb pressure to prevent belt tooth stripping during high-power launches.

  • Sur-Ron Light Bee X vs. Talaria Sting R: Wiring, Controller & Modding Differences

    Sur-Ron Light Bee X vs. Talaria Sting R: Wiring, Controller & Modding Differences


    When choosing an electric dirt bike platform for heavy aftermarket modification, the debate between the Sur-Ron Light Bee X and the Talaria Sting R (MX4) comes down to structural architecture, drivetrain efficiency, and controller compatibility. While both bikes share a similar lightweight aluminum perimeter frame concept, their factory wiring harnesses, primary drive systems, and throttle communication protocols differ significantly.

    This comparative guide analyzes the core technical differences between the Light Bee X and Sting R, focusing on primary drive mechanics, controller pinout setups, battery compartment dimensions, and 72V upgrade overhead.


    1. Drivetrain Architecture: Primary Belt vs. Sealed Gearbox

    The most significant mechanical difference between the two platforms lies in how power transfers from the electric motor shaft to the jackshaft:

    • Sur-Ron Light Bee X (Primary Belt): Uses a rubber primary belt drive. While lightweight and extremely quiet, stock belts are prone to snapping under high torque spikes when paired with upgraded high-amp controllers. Many riders convert their setup to a heavy-duty primary chain kit.
    • Talaria Sting R (Sealed Gearbox): Features an enclosed oil-filled primary gearbox. It eliminates belt breakage entirely and handles higher instant torque, though it requires periodic gear oil changes (typically every 600 miles / 1,000 km).

    2. Controller Pinouts & Aftermarket Compatibility

    Both models utilize sine-wave permanent magnet synchronous motor (PMSM) controllers, but their wiring connectors and communication protocol standards are not pin-for-pin interchangeable.

    The Sur-Ron stock harness utilizes a widely standardized 5-pin Hall sensor plug and a standard 0–5V 3-pin Hall effect throttle curve. This makes integrating universal speed controllers straightforward without needing proprietary harness adapters.

    In contrast, the Talaria Sting R uses a modified factory harness layout with an integrated CAN-bus display link. Upgrading the Sting R to aftermarket controllers like BAC4000/BAC8000 or EBMX requires Talaria-specific harness adapters to prevent dashboard error codes.


    3. Battery Bay Clearance & 72V Conversion Overhead

    Both stock platforms operate on 60V nominal systems (60V 38Ah on the Sur-Ron; 60V 45Ah on the Sting R). However, when upgrading to high-discharge 72V or 84V custom lithium battery packs, frame tray clearance becomes a critical factor:

    • Sur-Ron Battery Clearance: The battery bay is narrower, meaning taller 72V packs require battery lid risers or extended latch brackets. However, the aftermarket ecosystem for custom Sur-Ron battery trays is massive.
    • Talaria Battery Clearance: Features a slightly wider and deeper stock battery compartment from the factory, accommodating larger capacity 60V or 72V packs with less lid modification required.

    Planning a power overhaul on your platform? Read our detailed walkthrough on Sur-Ron Light Bee X 72V battery and controller upgrades.


    4. Summary: Which Platform Should You Build?

    Choose the Sur-Ron Light Bee X if you want maximum aftermarket part availability, plug-and-play controller choices, and a lighter overall chassis (~104 lbs / 47 kg). Choose the Talaria Sting R if you prefer an oil-filled primary gearbox out of the box, a wider battery compartment, and slightly beefier stock suspension.


    Frequently Asked Questions

    What is the main drivetrain difference between the Sur-Ron Light Bee X and Talaria Sting R?

    The Sur-Ron Light Bee X uses a rubber primary belt drive, whereas the Talaria Sting R features an enclosed, oil-filled primary gearbox.

    Which platform has more aftermarket modification support?

    The Sur-Ron Light Bee X boasts a massive aftermarket ecosystem with plug-and-play controller choices and extensive battery tray upgrade parts.

  • Sur-Ron Light Bee X 72V Battery & BAC/Sabvoton Controller Upgrade Guide

    Sur-Ron Light Bee X 72V Battery & BAC/Sabvoton Controller Upgrade Guide


    The Sur-Ron Light Bee X is arguably the most popular lightweight electric dirt bike on the planet. Out of the box, its 60V system delivers impressive agility, but enthusiasts quickly crave more punch, faster top-end speed, and ruthless torque for steep hill climbs.

    Unlocking the true full potential of the Light Bee X requires breaking past the stock power ceiling. The ultimate powertrain overhaul consists of two core components: a high-discharge 72V lithium battery pack and a high-voltage aftermarket controller like the ASI BAC4000 / BAC8000 or a custom Sabvoton Field Oriented Control (FOC) controller.

    In this comprehensive guide, we cover everything you need to know about planning, wiring, tuning, and protecting your 72V Sur-Ron high-power build.


    Why Upgrade to 72V? (The Power Equation)

    Electric power is measured in Watts (Watts = Volts × Amps). The factory Light Bee X setup produces roughly 5kW to 6kW of peak output at 60V nominal.

    By increasing the system voltage from 60V (67.2V max) to 72V (84.0V max), you achieve several major performance gains:

    • Increased Motor RPM & Top Speed: Brushless DC motor RPM scales linearly with voltage. A 72V power supply instantly boosts maximum motor speed by ~20%, raising top speeds from ~45 mph to 65–75+ mph.
    • Reduced Thermal Stress at Equivalent Power: Delivering 10kW at 72V requires less current (Amperes) than delivering 10kW at 60V. Lower current means reduced resistive heating ($I^2R$ loss) in cables and phase wires.
    • Instant Throttle Response & Massive Torque: Coupled with an unlocked field-oriented controller, a 72V setup enables wheelie-on-demand torque across the entire RPM curve.

    Choosing the Right Controller: ASI BAC vs. Sabvoton vs. Modern FOCs

    You cannot run a 72V battery on the stock Sur-Ron X-Controller. You must install a programmable controller capable of handling 84V+ peak input.

    Controller Model Peak Power Limit Best Used For Tuning Complexity
    ASI BAC4000 Up to ~15 kW Aggressive trail riding, hard enduro, stock motor builds. Medium (Requires plug-and-play kit or bluetooth app).
    ASI BAC8000 Up to ~35 kW+ Extremist drag builds, upgraded aftermarket motors (Sotion/KO). Medium (Higher thermal mass heatsink).
    Sabvoton (72150 / 72200) Up to ~12 kW – 18 kW Budget-friendly DIY builders wanting smooth sine wave control. High (PC/USB manual wire mapping required).

    1. ASI BAC4000 / BAC8000 (Accelerated Systems Inc.)

    ASI controllers are renowned for their ultra-smooth Field Oriented Control (FOC) algorithms and compact form factors. Most aftermarket kits (such as EGGRider, GLE, or EBMX tunes) offer plug-and-play wiring harnesses that integrate directly with the stock display, throttle, and sensors.

    2. Sabvoton Controllers (e.g., SVMC72150)

    Sabvoton is a popular choice for custom DIY builders. While heavier and bulkier than BAC controllers, Sabvoton units offer robust thermal protection, built-in Bluetooth tuning options, and direct parameter adjustment for phase amps, regen braking strength, and throttle curves.


    Selecting a 72V Lithium Battery Pack

    Upgrading to a 72V controller without upgrading your battery will result in instantaneous BMS cutoffs. When purchasing or building a 72V pack for a Sur-Ron, pay attention to these critical specs:

    • Cell Chemistry & Brand: Look for high-drain 21700 or 18650 cells (e.g., Samsung 50S, Molicel P42A/P45B). High-drain cells prevent voltage sag under heavy throttle demands.
    • Continuous & Peak Discharge Ratings: To safely feed a BAC4000 tuned to 12kW, your battery pack BMS and cell configuration must support at least 150A continuous and 250A peak discharge current.
    • Physical Tray Fitment: High-capacity 72V battery packs are taller than stock. You will need an extended battery latch / seat riser kit to secure the battery lid safely.

    Encountering electrical cutouts or battery shutoffs after installing a new battery? Refer to our step-by-step guide on Troubleshooting Sur-Ron Throttle Issues, Error Blink Codes & BMS Lockouts.


    Step-by-Step Installation & Tuning Guidelines

    Step 1: High-Current Wiring & Safety Precautions

    1. Disconnect the main battery power connector and switch off the main breaker under the seat cover.
    2. Remove the stock X-Controller and disconnect phase wires (Yellow, Green, Blue) and power leads.
    3. Upgrade phase wire ring terminals and main connectors if necessary. When pushing past 12kW, stock wire gauges can heat up significantly; ensure all power connections are torqued down securely.

    Step 2: Configuring Controller Parameters

    When tuning an ASI BAC or Sabvoton controller via software or app, apply conservative base settings before pushing maximum thresholds:

    • Low Voltage Cutoff (LVC): Set LVC for a 20S (72V nominal) pack around 60V to 62V to prevent over-discharging the cells.
    • Max Battery Current (DC Amps): Align this parameter directly with your battery pack BMS limit (e.g., 120A DC limit for a 10kW setup).
    • Max Phase Current (AC Amps): Phase current dictates off-the-line low-speed torque. For the stock Sur-Ron air-cooled motor, keep phase current under 350A – 400A to prevent overheating stator windings.

    Essential Supporting Mods for 72V Builds

    Doubling or tripling the horsepower of your Sur-Ron Light Bee X creates additional mechanical stress on chassis and drivetrain components. We strongly advise adding the following upgrades alongside your 72V build:

    1. Upgraded Primary Belt / Chain Drive: High phase current can shred stock rubber primary belts instantly. Convert to a heavy-duty 420 primary chain drive kit or reinforced belt system.
    2. High-Performance Hydraulic Brakes: Stopping from 65+ mph requires severe braking power. Upgrade to 220mm oversized brake rotors and 4-piston hydraulic calipers.
    3. Suspension Tuning: The added weight of a larger 72V battery requires stiffer fork springs or upgraded rear shock valving.


    Frequently Asked Questions

    How fast does a Sur-Ron Light Bee X go with a 72V battery and BAC4000 controller?

    With a 72V battery pack and an ASI BAC4000 controller tuned to around 12kW–15kW peak power, top speed increases from the stock 45 mph (72 km/h) up to 65–75 mph (105–120 km/h) depending on gearing and rider weight.

    Do I need to change the stock motor when upgrading to 72V on a Sur-Ron?

    The stock Sur-Ron motor (air-cooled IPM) can handle 72V up to 12kW-15kW peak bursts safely. However, for continuous heavy trail riding or competitive racing above 15kW, an upgraded liquid-cooled or higher thermal capacity aftermarket motor is recommended.

    Can I run a 72V battery on the stock Sur-Ron X-Controller?

    No. The factory X-Controller is hardware-capped for 60V nominal packs (maximum voltage limit ~67.2V). Connecting a 72V pack (84V fully charged) will immediately trigger over-voltage protection or destroy the controller MOSFETs.

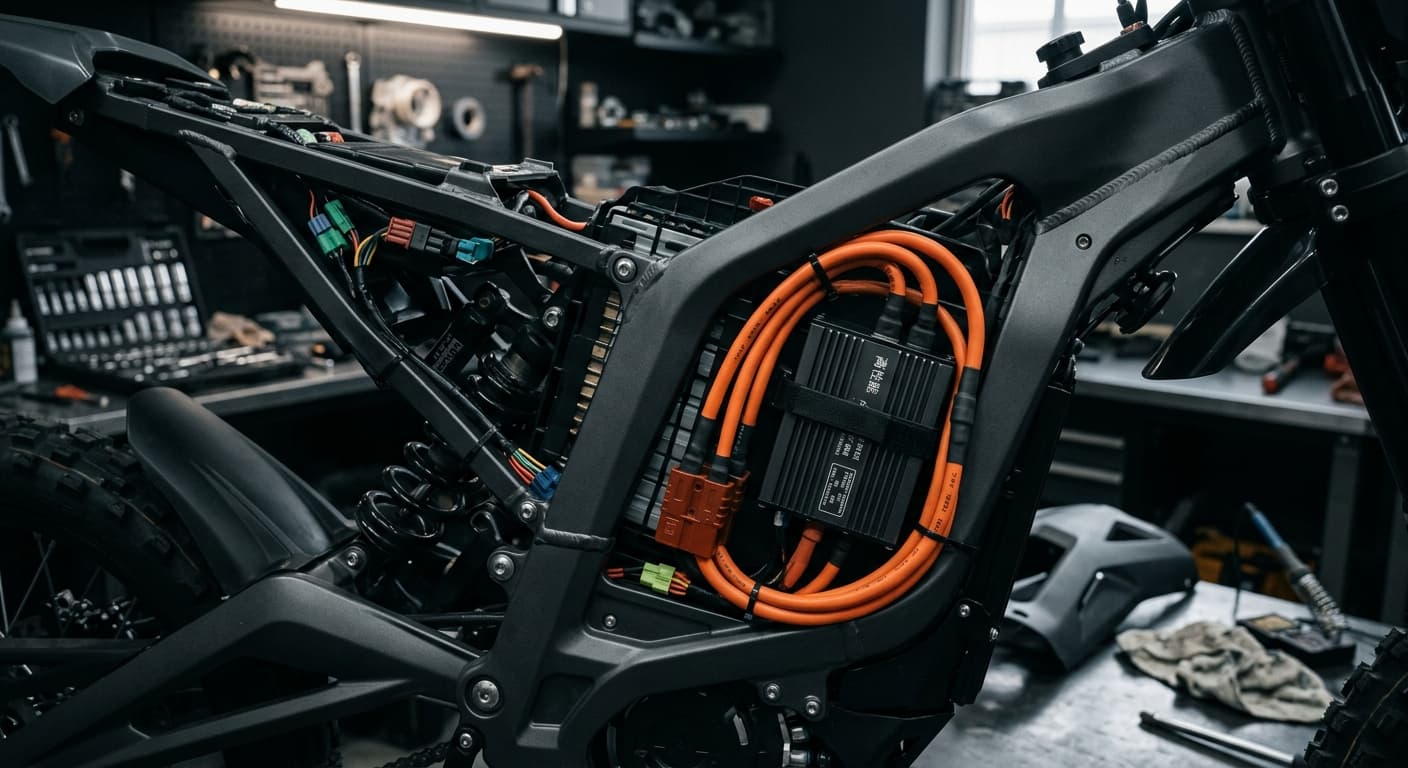
  • Best Electric Dirt Bike Under $200: Budget Buying, DIY Restoration & Cheap Mod Guide

    Best Electric Dirt Bike Under $200: Budget Buying, DIY Restoration & Cheap Mod Guide

    Finding a brand-new, reliable adult or teen electric dirt bike for under $200 is virtually impossible from retail stores. Most new entry-level models start around $500 to $1,000+. However, for DIY builders and parents on a tight budget, getting a functional electric dirt bike under $200 is completely achievable through the secondhand marketplace and targeted DIY restorations.

    This guide covers how to hunt for used project frames on local classifieds, diagnose common cheap fixes, and execute low-cost performance upgrades on a shoestring budget.


    1. Where & How to Source a Project Bike Under $100–$150

    The secret to staying under the $200 threshold is buying a used, non-running bike with a solid frame and motor, but dead lead-acid batteries:

    Before purchasing, learn about frame sizing, motor differences, and factory wire harnesses in our Razor MX650 vs MX500 Wiring Diagram Guide. Sourcing a four-wheel frame or MotoTec chassis? Check our Razor Dirt Quad Wiring & Diagnostic Guide and MotoTec Electric Dirt Bike Troubleshooting Guide.

    • Top Search Platforms: Facebook Marketplace, OfferUp, Craigslist, and local garage sales.
    • Target Search Terms: Search for “Razor MX350 non running”, “Razor dirt bike for parts”, “kids electric bike dead battery”, or “Razor Dirt Quad project”.
    • Target Models: Used Razor MX350, MX400, MX500, or MotoTec 24V/36V models. Sellers often list non-running bikes for $50 to $120 simply because the original SLA batteries expired.

    2. Budget Restoration & Mod Cost Breakdown

    Here is how to allocate your $200 total budget to transform a broken donor bike into a reliable, fast ride:

    Component / Step Estimated Cost DIY Strategy / Part Recommendation
    Used Donor Bike (Frame/Motor) $60 – $100 Buy a complete bike with working motor and mechanical brakes.
    Budget Lithium Battery Pack $50 – $75 36V 10Ah Power Tool Batteries (e.g., Ryobi/DeWalt adapters) or cheap AliExpress 36V Li-ion pack.
    36V 500W Universal Controller $12 – $18 Generic 36V brushed speed controller module from eBay/Amazon.
    Twist Throttle + Key Switch $10 – $15 36V universal 5-pin or 6-pin twist throttle with integrated voltmeter.
    Total Estimated Build Cost $132 – $208 Fully functional 36V electric dirt bike running 18–20 mph!

    For complete installation steps on aftermarket throttles and voltage displays, consult our 3-Speed Throttle & Key Ignition Wiring Guide.


    3. Low-Cost Performance Hacks

    Hack 1: The Power Tool Battery Trick (Zero-Soldering Lithium Swap)

    If you don’t want to build a custom lithium battery pack, buy two 3D-printed battery dock adapters for power tool batteries (e.g., Ryobi 18V ONE+ or DeWalt 20V Max). Wiring two 18V power tool batteries in series provides a lightweight 36V lithium setup for under $20 in adapter hardware, instantly boosting acceleration and top speed.

    Hack 2: Overvolting 24V Stock Motors to 36V

    Stock 24V motors on the Razor MX350 handle 36V without burning out, provided you keep heat in check. Swapping the stock 24V controller for a cheap $15 36V brushed controller gives you an immediate ~5 mph speed increase without replacing the factory motor.

    If your budget throttle fails to trigger after overvolting, use our E-Bike Throttle Diagnostics & Voltage Troubleshooting Guide. Planning a high-power brushless build in the future? Read our Sabvoton & Kelly Controller Universal Wiring Breakdown.


    4. Frequently Asked Questions (FAQ)

    Are $200 brand-new electric dirt bikes on Amazon legitimate?

    Be cautious. Most brand-new listings under $200 on random marketplace storefronts are either tiny low-power toddler toys (6V/12V with plastic wheels) or fraudulent listings. Stick to secondhand brand-name restoration projects (like Razor or MotoTec) for real metal frames and inflatable pneumatic tires.

    How fast can a $200 budget project bike go?

    A stock 24V Razor MX350 travels around 12 mph. By converting it to a 36V setup using power tool batteries or a budget lithium pack, the bike will reliably reach 17–20 mph (27–32 km/h) with a lightweight rider.

    How can I make my restored budget project bike street-legal?

    If you want to ride your custom build on public roads legally, explore our Street-Legal Electric Dirt Bike Pedal Kit & PAS Conversion Guide.

  • Sabvoton / Kelly / LB Controller Universal Wiring Breakdown for E-Dirt Bikes

    Sabvoton / Kelly / LB Controller Universal Wiring Breakdown for E-Dirt Bikes

    Upgrading your stock electric dirt bike with a high-performance aftermarket brushless controller—such as a Sabvoton (SVMC Series), Kelly Controls (KLS Series), or Lingbo (LB / FarDriver Series)—unlocks higher phase current, programmable speed modes, and regenerative braking. However, mapping the universal multi-pin wire harness to your battery, throttle, and Hall sensors can be confusing.

    This guide provides a universal color-coded wire breakdown, pinout map, and troubleshooting steps to wire any Sabvoton, Kelly, or LB controller safely.


    1. High-Power Terminal Connections (Heavy Cables)

    All high-power brushless DC (BLDC) controllers share five primary heavy-gauge ring terminals. Connecting these incorrectly will immediately damage the MOSFETs:

    If you are upgrading from stock Razor brushed setups or factory harnesses, check our Razor MX650 vs MX500 Wiring Diagram Guide and MotoTec Electric Dirt Bike Troubleshooting Guide for base frame comparisons.

    • B+ (Battery Positive): Heavy Red wire connected to the battery main (+) terminal through an inline circuit breaker or fuse.
    • B- (Battery Negative): Heavy Black wire connected directly to the battery (-) negative post.
    • Phase Wires (Motor Coils): Three heavy cables—Yellow (Phase A), Blue (Phase B), and Green (Phase C)—connected to the brushless hub or mid-drive motor.

    2. Universal Low-Voltage Control Harness Pinout

    The small multi-wire control plug handles signal inputs from your throttle, brake cutoffs, ignition lock, and Hall sensors. Below is the standard wire function matrix for Sabvoton, Kelly, and LB controllers:

    Function / Port Sabvoton Wire Color Kelly Wire Color LB / FarDriver Wire Color
    Ignition / Lock Orange Red (Pin 1) Orange / Pink
    Throttle (+5V Power) Red Red (Pin 2) Red
    Throttle (Ground) Black Black (Pin 20) Black
    Throttle (Signal Input) Green / White Green (Pin 3) Green
    Hall (+5V Power) Red (Hall Plug) Red (Pin 28) Red (Hall Plug)
    Hall (Ground) Black (Hall Plug) Black (Pin 29) Black (Hall Plug)
    Hall A / B / C Signals Yellow / Green / Blue Yellow / Green / Blue Yellow / Green / Blue
    Low Brake (Cut-off) Yellow / Black Purple (Pin 6) Yellow / Green
    Reverse Switch Grey / Black Grey (Pin 18) Brown

    Connecting a multi-speed throttle or key lock display to these control terminals? Follow our 3-Speed Throttle & Key Ignition Wiring Guide. If you encounter throttle response faults during setup, refer to our E-Bike Throttle Diagnostics & Voltage Troubleshooting Guide.


    3. Step-by-Step Commissioning & Phase Matching

    Step 1: Wire the Ignition Circuit

    Unlike stock controllers, high-power controllers require a dedicated ignition signal line (12V–72V) to boot up the internal micro-controller. Connect the Key Lock / Ignition Wire to your main battery positive via your handlebar key switch.

    Step 2: Solve Hall Sensor & Phase Wire Misalignment

    If the motor vibrates, turns backward, or draws high current without spinning smoothly during initial setup, the Hall sensor sequence does not match the phase wire sequence. Follow this process:

    • Programmable Controllers (Sabvoton / FarDriver): Connect via Bluetooth or USB and run the Self-Learning / Hall Auto-Identify routine in the app. The controller will automatically detect the phase angles (60° or 120°) and correct the rotation direction.
    • Manual Swap Method: If your controller lacks auto-learning, keep the Hall sensor wires matched (Yellow to Yellow, Green to Green, Blue to Blue) and swap any two Phase Wires (e.g., swap Blue and Green) to reverse motor rotation smoothly.

    Building a high-voltage brushless bike on a strict budget? Check out our Under $200 DIY Electric Dirt Bike Restoration Guide.


    4. Frequently Asked Questions (FAQ)

    What happens if I short the Hall sensor 5V power wire to ground?

    Shorting the 5V auxiliary feed will fry the internal step-down voltage regulator on the controller PCB. Always disconnect the battery main power before splicing or crimping throttle and Hall sensor connectors.

    Do I need a contactor or pre-charge resistor for Sabvoton or Kelly controllers?

    Yes. High-voltage setups (60V–72V) have large internal capacitors. Plugging in the battery directly causes a heavy spark that damages connectors. Using an anti-spark XT90-S plug or a 100Ω pre-charge resistor prevents arc damage.

    Can I add pedals to make a high-power brushless dirt bike street-legal?

    Yes. To explore pedal-assist integration and street compliance steps, see our Street-Legal Electric Dirt Bike Pedal Kit & PAS Conversion Guide.

  • Stock Razor Throttle to 3-Speed / Key Ignition Upgrade Guide

    Stock Razor Throttle to 3-Speed / Key Ignition Upgrade Guide

    Replacing the stock single-speed twist grip on a Razor MX500, MX650, or Dirt Quad with an aftermarket 3-speed throttle featuring a key ignition lock and digital voltage display is one of the most practical upgrades for custom electric dirt bike builds. It adds anti-theft security, live battery tracking, and selectable power modes.

    However, aftermarket throttle grips use non-standard wire color schemes compared to stock Razor control modules (such as the ZK3630 or CT-363C). This guide breaks down the exact pinout connections, wire color conversions, and step-by-step installation instructions.


    1. Throttle Wire Function & Color Conversion Chart

    Before cutting or soldering, match your controller plug wires with your new aftermarket throttle harness using the reference table below:

    If you encounter unresponsive throttles or dead indicator lights during setup, check our E-Bike Throttle Diagnostics & Voltage Troubleshooting Guide. For base frame color codes and pinouts, consult our Razor MX650 vs MX500 Wiring Diagram Guide.

    Function Stock Razor Controller Wire Color Standard Aftermarket Throttle Wire Color
    +5V Power (Hall Sensor) Red Red
    Ground (GND) Black Black
    Throttle Signal Green Green / White
    Key Ignition (Lock In) Orange / Blue (Switch line) Yellow / Pink (Full Pack Voltage)
    Key Ignition (Lock Out) Connects to Controller Power Lock Blue
    3-Speed Mode (Low/Med/High) N/A (Universal Controller 3-Speed Port) Brown / Blue / Black (3-Pin Plug)

    2. Step-by-Step Wiring Instructions

    Step 1: Wire the Hall Sensor (5V Speed Control)

    The core throttle control relies on a 3-wire Hall effect sensor circuit:

    • Connect Red (+5V) to Red.
    • Connect Black (GND) to Black.
    • Connect Green (Signal) to Green or White.

    Step 2: Wire the Key Switch & Voltmeter Display

    The digital voltmeter and key switch operate directly on full battery pack voltage (24V, 36V, 48V, or 72V):

    • Route the Key In wire (Yellow) to the positive terminal of your battery pack or the positive power input line on your key switch port.
    • Connect the Key Out wire (Blue) to the controller’s electric lock line. Turning the key closes the circuit and powers on the controller and digital voltmeter.

    Working on a four-wheel vehicle or other brand platform? Check our Razor Dirt Quad Troubleshooting & Wiring Guide and MotoTec Electric Dirt Bike Troubleshooting Guide.

    Step 3: Connect the 3-Speed Mode Selector Switch

    If you are using a 3-speed aftermarket throttle with an upgrade controller:

    • Plug the 3-wire harness into the controller’s Three-Speed Interface.
    • Shorting Ground + Low wire activates Economy Mode, while shorting Ground + High wire engages High Speed / Overclock mode.

    If you are pairing this throttle with high-power programmable controllers, follow our Sabvoton & Kelly Controller Universal Wiring Breakdown. Restoring an older bike on a budget? Check our Under $200 DIY Electric Dirt Bike Restoration Guide.


    3. Frequently Asked Questions (FAQ)

    Why does my digital voltmeter stay ON when the key is turned off?

    If the display remains illuminated after turning off the key, the Key In (Yellow) and Key Out (Blue) wires are swapped or connected upstream of the ignition relay. Reverse the two key lines to ensure the switch breaks the main display feed.

    Can I install a 3-speed throttle on a stock Razor controller?

    Yes for the throttle and key ignition features, but the 3-speed switch will have no effect on stock Razor modules (CT-363C) as they lack internal 3-speed signal processing circuits. You need an aftermarket universal controller to use power mode selection.

    How can I make my upgraded dirt bike street-legal?

    If you’re building a street-compliant e-bike with multi-speed controls, explore our Street-Legal Electric Dirt Bike Pedal Kit & PAS Conversion Guide.

  • How to Troubleshoot a Razor Electric Bike That Won’t Throttle (Blink Codes & BMS Lockout)

    How to Troubleshoot a Razor Electric Bike That Won’t Throttle (Blink Codes & BMS Lockout)

    When you twist the throttle on your Razor electric dirt bike and nothing happens, the problem is usually caused by a tripped safety sensor, a blown fuse, or a locked-out Battery Management System (BMS). Whether you are riding a stock 24V/36V Razor MX350, MX500, or MX650, or operating an overvolted lithium setup, this step-by-step diagnostic guide will help you isolate and fix the issue.


    1. Quick Diagnostic Checklist

    Before disassembling the battery tray or cutting wire harnesses, run through these primary checks:

    If you are servicing four-wheel models or other electric dirt bike brands, explore our Razor Dirt Quad Wiring & Diagnostic Guide and MotoTec Electric Dirt Bike Troubleshooting Guide. Restoring an older bike on a budget? Check our Under $200 DIY Electric Dirt Bike Restoration Guide.

    • Power Indicator Light: Is the handlebar switch or power button LED illuminating solid red/green? If not, check the main inline fuse near the battery port.
    • Brake Lever Release: Are the brake levers resting fully forward? Stock Razor controllers feature an auto-cutoff microswitch inside the levers that cuts motor power whenever the brakes are engaged.
    • Battery Voltage: Is the resting voltage above the controller’s Low Voltage Cutoff (LVC)? Standard 36V controllers will cut throttle output if the circuit drops below ~31.5V.

    2. Decoding Controller Status Lights & Blink Codes

    Aftermarket and late-model Razor controllers (such as the ZK3630 or CT-363C) feature built-in diagnostic LEDs on the controller casing. Count the blink pattern to pinpoint the fault:

    Blink Pattern / Status Probable Cause Recommended Action
    Solid LED (On) Normal operation (Standby) Inspect throttle signal pin voltage (0.8V–4.2V DC range).
    2 Blinks Brake Switch Actuated Disconnect brake cut-off plugs to test if throttle responds.
    3 Blinks Low Voltage Cutoff (LVC) / BMS Shutdown Recharge battery pack or reset BMS (unplug balance leads).
    4 Blinks Throttle Signal Fault Check 5V hall sensor wiring; replace twist throttle module.
    Continuous Rapid Blinking MOSFET Short Circuit / Overcurrent Failure Controller shorted out internally; replace control module.

    3. Step-by-Step Electrical Diagnostics

    Step 1: Bypass the Brake Cut-Off Switches

    The most common cause of an unresponsive throttle is a stuck brake switch micro-contact. Locate the two 2-pin connectors labeled “Brake” on the controller harness (usually yellow/black wires). Unplug both connectors completely and test the throttle again. If the motor turns, replace the damaged brake lever sensor.

    Step 2: Test Throttle Signal Output with a Multimeter

    To verify whether the hall sensor inside the throttle grip is functioning:

    • Set your digital multimeter to DC Voltage (20V range).
    • Place the black probe on the Ground Wire (Black) and the red probe on the Signal Wire (Green) at the throttle plug.
    • With power turned ON, slowly twist the throttle:
      • Idle Position: Should read approximately 0.8V to 1.0V DC.
      • Full Throttle: Should rise smoothly to 3.6V – 4.2V DC.
    • If output remains static at 0V or 5V, the hall sensor inside the throttle is blown and requires replacement.

    For detailed color-code mappings and controller pinouts on stock bikes, consult our Razor MX650 vs MX500 Wiring Diagram Guide. Replacing your throttle assembly entirely? Follow our 3-Speed Throttle & Key Ignition Wiring Guide.

    Step 3: Resolve Lithium BMS Lockout

    If you upgraded your Razor bike to a custom 36V/48V lithium battery and the bike suddenly cuts off under heavy acceleration, the BMS protection circuit has tripped due to Overcurrent Protection (OCP) or Low Voltage Cutoff (LVC).

    • How to Reset the BMS: Unplug the main XT60/XT90 discharge plug from the controller, plug in the charger for 5–10 seconds to awaken the BMS protection circuit, and re-check total pack voltage.

    If you are replacing the factory controller with a high-power aftermarket brushless unit, refer to our Sabvoton & Kelly Controller Universal Wiring Breakdown.


    4. Frequently Asked Questions (FAQ)

    Why does my Razor motor click but not spin?

    A clicking sound indicates the main power relay inside the controller is engaging, but insufficient current is reaching the motor coils. This usually points to a heavily sagged battery pack, corroded battery spades, or blown controller MOSFETs.

    Can I ride my Razor bike with the brake cut-off disconnected?

    Technically yes, but it is unsafe. Disconnecting the cutoff bypasses a critical safety feature that prevents the motor from fighting against the mechanical disc brakes in emergency stops.

    How can I make my Razor dirt bike street-legal?

    If you want to add pedals and turn your modified Razor into a legal Class 2 or Class 3 e-bike, check out our Street-Legal Electric Dirt Bike Pedal Kit & PAS Conversion Guide.

  • Razor MX650 vs. MX500 Wiring Diagram & Key Differences

    Razor MX650 vs. MX500 Wiring Diagram & Key Differences

    The Razor MX650 Dirt Rocket and Razor MX500 are two of the most popular platforms for custom electric dirt bike builds. While both share identical frame geometry, their factory electrical systems, controller pinouts, and motor power delivery differ significantly.

    Whether you are replacing a blown stock controller or planning a 48V/72V lithium upgrade, this guide breaks down the exact wiring diagram differences, stock pinouts, and key electrical specs for the MX650 and MX500.


    1. Quick Specification Comparison

    Before diving into the harness details, here is how the stock electrical components compare between both models:

    If you are also comparing Razor’s two-wheel dirt bikes with their four-wheel quad platforms or other brands, explore our Razor Dirt Quad Wiring & Diagnostic Guide and MotoTec Electric Dirt Bike Troubleshooting Guide.

    Component Razor MX650 Dirt Rocket Razor MX500 Dirt Rocket
    System Voltage 36V DC (3x 12V 12Ah Lead-Acid) 36V DC (3x 12V 12Ah Lead-Acid)
    Motor Power 650W Brushed Rare-Earth Motor 500W Brushed Rare-Earth Motor
    Stock Controller 36V 30A Control Module (ZK3630 / CT-363C) 36V 30A Control Module (CT-363C)
    Speed Throttle Variable Speed Twist-Grip (5-Pin / 6-Pin) Variable Speed Twist-Grip (5-Pin / 6-Pin)
    Top Speed (Stock) ~17 mph (27 km/h) ~15 mph (24 km/h)

    2. Razor MX650 vs MX500 Wiring Harness & Pinout Breakdown

    Both models use a 36V brushed speed controller mounted inside the lower frame. Below is the standard wire color definition for the stock control modules (e.g., ZK3630-D / CT-363C):

    • Battery Input (Thick Red & Black): Connects directly to the 36V battery pack via a 30A inline fuse.
    • Motor Output (Thick Blue & Yellow): Connects to the 500W/650W brushed motor (reverse blue/yellow to change motor rotation).
    • Power Switch (Red & Black 2-pin connector): Connects to the handlebar ON/OFF toggle switch.
    • Throttle Connector (4-pin or 5-pin plastic plug):
      • Red (+5V Power)
      • Black (Ground)
      • Green (Throttle Signal)
      • Orange / Yellow (Battery Indicator LED)
    • Brake Cut-off Switches (Two 2-pin connectors): Yellow/Black wires that cut power to the controller when brake levers are pulled.
    • Charger Port (Red & Black 3-pin XLR): Routes through a charging port to the battery terminal.

    Upgrading to a multi-function twist grip with digital battery displays? Follow our 3-Speed Throttle & Key Ignition Wiring Guide. If you encounter throttle power-cut issues, check out our E-Bike Throttle Diagnostics & Voltage Troubleshooting Guide.


    3. Key Electrical Differences When Upgrading

    When planning a custom build, keep these critical electrical nuances in mind:

    A. Motor Gearing & Heat Dissipation

    The MX650’s 650W motor has slightly thicker internal copper windings and handles overvolting to 48V or 60V better than the MX500’s 500W motor. The MX500 motor heats up significantly faster under heavy load when paired with higher amperage aftermarket controllers.

    B. Controller Interchangeability

    Stock controllers for both the MX650 and MX500 are largely interchangeable because both operate on a 36V baseline. However, early MX500 revisions used a 5-wire throttle, whereas late-model MX650s feature a 6-wire connector with an integrated LED voltage bar.

    If you plan to bypass the stock brushed setup for a high-power programmable controller, refer to our Sabvoton & Kelly Controller Universal Wiring Breakdown. Building on a budget? Check our Under $200 DIY Electric Dirt Bike Restoration Guide.


    4. Frequently Asked Questions (FAQ)

    Can I put an MX650 controller on an MX500?

    Yes. Since both stock systems run on 36 Volts, the MX650 controller can be installed directly into an MX500 frame provided the throttle connector pins match your handlebar twist throttle.

    What happens if I overvolt a stock MX650/MX500 to 48V?

    Running a 48V lithium battery through a stock 36V controller will trigger the controller’s Low Voltage Cutoff (LVC) or over-voltage protection, causing it to shut down or burn the MOSFETs. You must replace the stock module with an adjustable 36V-72V 1000W+ brushed/brushless controller.

    How can I make my MX650 or MX500 street-legal?

    To ride on public streets legally as a Class 2 or Class 3 e-bike, check out our Street-Legal Electric Dirt Bike Pedal Kit & PAS Conversion Guide.

  • How to Make an Electric Dirt Bike Street Legal: Pedal Kit Installation, PAS Wiring & Class 2 Conversion Guide

    How to Make an Electric Dirt Bike Street Legal: Pedal Kit Installation, PAS Wiring & Class 2 Conversion Guide

    One of the fastest-growing trends in the electric mobility community is converting off-road electric dirt bikes into street-legal Class 2 or Class 3 e-bikes. Adding functional pedals, street-legal lighting, and a controller speed limiter allows riders to enjoy their e-dirt bikes on public streets, suburban neighborhoods, and bike paths without running into law enforcement issues.


    1. Federal & State E-Bike Class Definitions

    To qualify as a street-legal bicycle rather than an unregistered motor vehicle (Moped/Motorcycle), your electric dirt bike must conform to standard e-bike classifications:

    Whether you are modifying a compact platform like a Razor or a heavy-duty frame like a MotoTec, staying compliant starts with knowing your frame’s base setup. Check our Razor MX125 & MX650 Battery Upgrade & Wiring Guide or MotoTec Electric Dirt Bike Troubleshooting Guide to verify your chassis layout.

    E-Bike Designation Top Speed Throttle Requirement Pedals Required?
    Class 1 E-Bike 20 mph No Throttle (Pedal Assist Only) YES (Mandatory)
    Class 2 E-Bike 20 mph Throttle Allowed YES (Mandatory)
    Class 3 E-Bike 28 mph Pedal Assist to 28mph (Throttle capped at 20mph) YES (Mandatory)

    2. Universal Bolt-On Pedal Kit Installation

    Most electric dirt bikes come from the factory with rigid footpegs instead of cranksets. Installing a universal pedal assist conversion kit involves three primary mechanical steps:

    1. Mounting the Bottom Bracket Bracket: Clamp or bolt the bottom bracket mounting plate onto the frame tubing directly below the motor mount.
    2. Chain Drive Setup: Run a secondary #410 or standard bicycle chain from the left/right pedal crank sprocket to a freewheel mounted on the rear axle.
    3. Crank & Pedal Attachment: Torque down 170mm aluminum alloy crank arms and standard 9/16″ street pedals.

    💡 Pro Modder Insight: Look for a pedal kit featuring a one-way freewheel bearing. This prevents the electric motor from spinning your pedals violently when accelerating via hand throttle!

    3. Wiring a PAS (Pedal Assist Sensor) to Your Controller

    A Cadence PAS Sensor uses a magnetic disc attached to the crank spindle to send pulse signals to the speed controller whenever you turn the pedals.

    [PAS SENSOR CABLE] —> 3-Pin SM Connector:
    – RED WIRE —> +5V Sensor Power
    – BLACK WIRE —> GND (Ground)
    – BLUE/YELLOW —> PAS Pulse Signal Input Pin

    When wiring PAS sensors into high-power or aftermarket controllers, consult our comprehensive Sabvoton & Kelly Controller Universal Wiring Breakdown for precise terminal pinouts.

    4. Speed Limiter & Street Mode Toggle Switch Setup

    To ensure full compliance, many riders install a hidden “Street Legal Switch” that toggles the bike between an unrestricted Off-Road Mode and a 20 mph Limited Street Mode.

    How to Wire a Dual-Speed Limit Switch:

    • Locate the 2-pin speed limiter loop on your brushless controller (usually two thin blue or white wires).
    • Cut the loop and wire a handlebar-mounted 2-position rocker switch inline.
    • Switch CLOSED: Controller caps speed at 20 mph / 750W (Class 2 Street Mode).
    • Switch OPEN: Full battery voltage & unrestricted motor power (Off-Road Mode).

    For a clean handlebar controls layout with built-in speed switches and key ignition, see our step-by-step tutorial on Razor Stock Throttle to 3-Speed Key Ignition Wiring Guide.

    5. Essential Street-Legal Accessory Checklist & FAQ

    Q: Do I need a DOT headlight and turn signals to ride on street roads?

    A: For Class 1-3 e-bikes, a white front headlight (visible from 500 ft) and a red rear reflector/tail light are universally required for night riding. Turn signals are recommended but not legally required in most US states for standard e-bikes.

    Q: Will adding a pedal kit pass police inspection if I get stopped?

    A: In almost all jurisdictions, having operable pedals, a 750W rating decal, and a functional 20 mph speed limiter satisfies the statutory definition of an e-bike, preventing impoundment as an unlicensed motorcycle.


    Note: Building your street-legal e-dirt bike on a low budget? Read our guide on How to Restore & Build an Electric Dirt Bike Under $200.

    Disclaimer: E-bike regulations vary by state, county, and municipality. Always check your local Department of Transportation (DOT) guidelines before riding on public roadways.